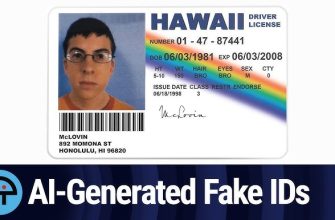
Today I will be detailing multiple of my own successful account verification approvals using Verif Tools USA-California Generator, and I will provide brief demonstrations as to how I performed them.
Case ONE: Online Verification – via image uploading/emailing.
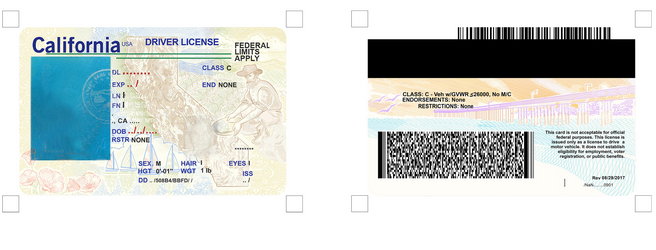
This case will be focused on getting verification approvals using methods of submitting generated photos from Verif.Tools , and is the most likely scenario many of you will be able to easily and cheaply replicate. To start off prepare your Photo scan with the most realistic looking background. I generally use this one:
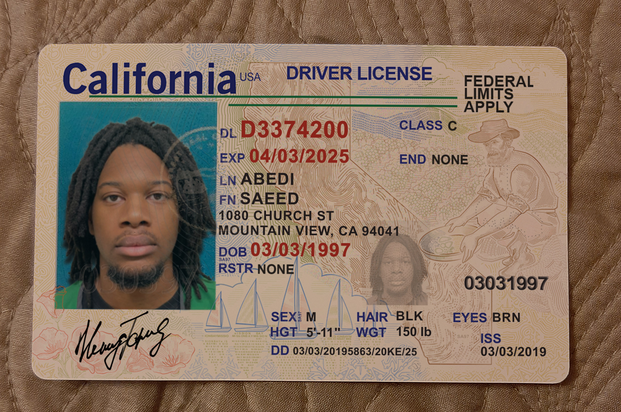
(Also please note this is a rough example Generator I am using. You would usually customize the signature yourself on the site and any other info provided on the Drivers License). –
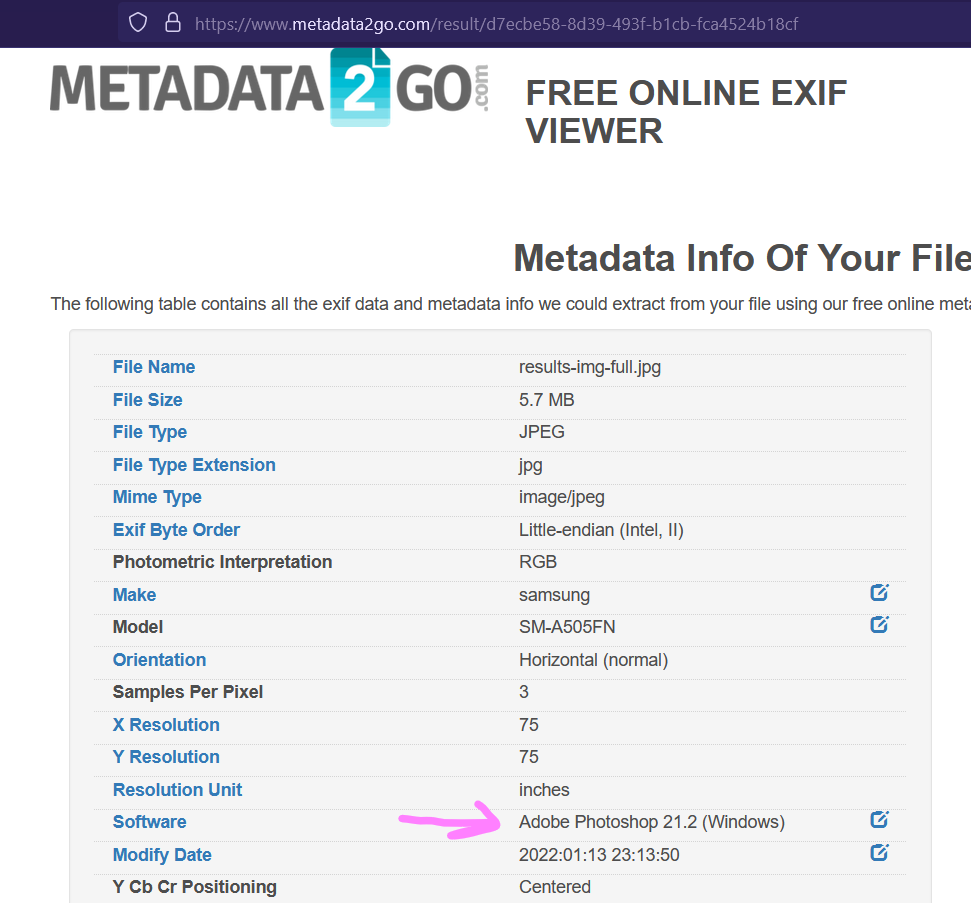
NOW BEFORE ANYTHING we will be checking the image we have for traces of Photoshop, which is something many people might not be aware of but can lead to your documents declining your account, NO MATTER HOW HIGH QUALITY THE LICENSE IS.
Step 1: Save your Generated Image to your device
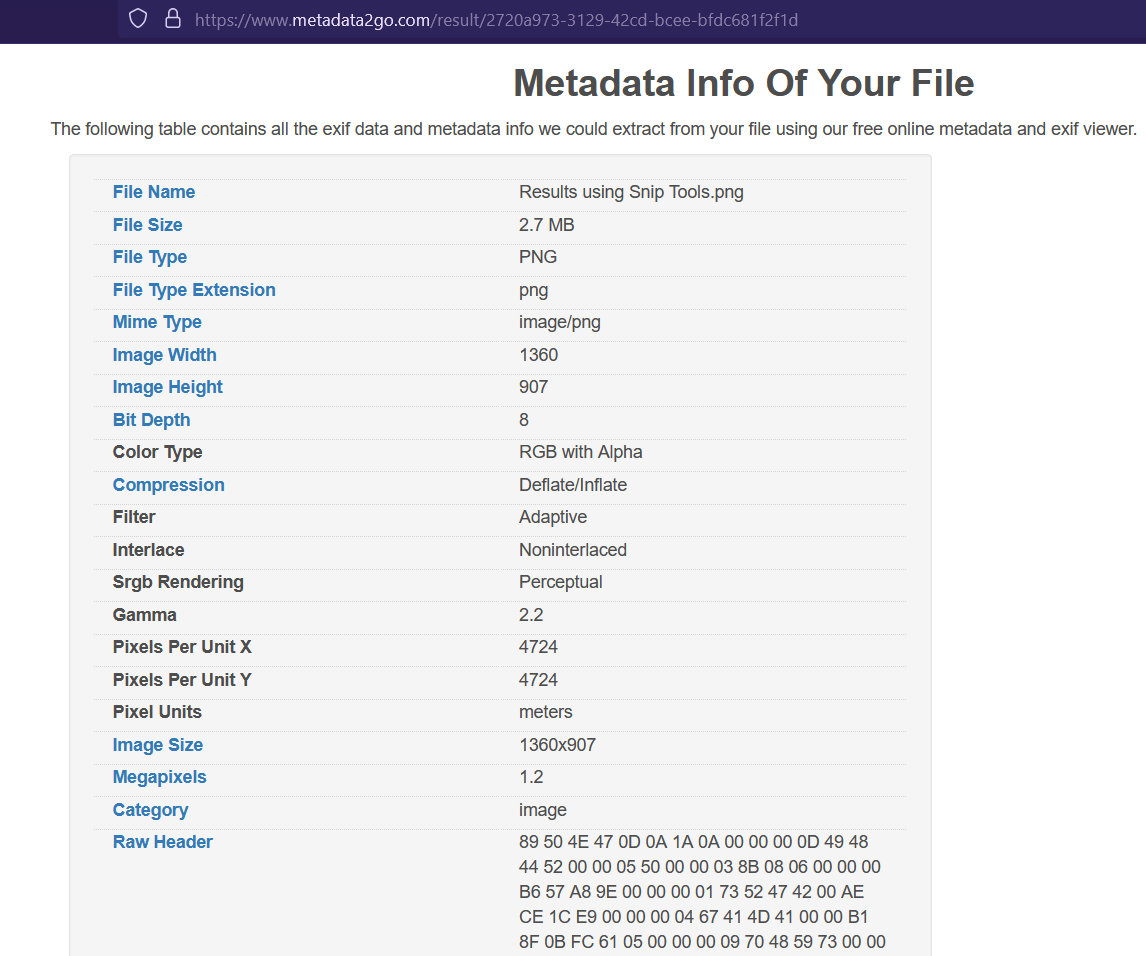
Step 2: Go to www.metadata2go.com and upload your image and click view meta data
Step 3: Now we can move onto cleaning meta Data
For this first method I simply did a fast and messy snip using the Windows OS ‘Snipping Tool’. I then saved the image again from the snip and ran it through our website above again:
NOTE:
If you want a more accurate sizing of your Driver License then I would recommend sending this image to yourself on a platform where you can also access the photo on your mobile device (such as sending it to your Telegram -> Saved Messages / Or emailing it to yourself, etc.).
Now that your image is clean!!!!! We are now ready for online submissions! YAY!
We will look at a few different real world examples I have used this in.
That about wraps it up for the online case we will now be moving onto
Case Two: Physical Sided Verification – via Live Camera Verification (possibly in-person verification as well)
Now I will be honest this method will take more time and money to get the hang of and get effective at. I personally feel like due to various qualities of phone cameras, shaky hands, poor lighting conditions, etc. that Identity verification over phone or webcam cameras can at times be tricky, however I will detail my success with turning Verif.Tools gens into real life products.
Please keep in mind I offer a limited class on printing high quality Identity Cards if you desire on learning more in this field, So I won’t be as detailed here as in my class! If you are interested in joining said class please contact me at the @ provided in the Author section near the top!
HOWEVER the info I provide here should be enough to get you started on your first few tests!
To start: you will need Matte paper or any other similar thicker than normal paper. I recommend it be between 5 mil – 10 mil. Make sure you get paper that is compatible with your printer type there is Laser, Inkjet, and Thermal to name the main ones.
NOW you will need to prepare your generated ID in the ‘Print’ generation format:
https://send.cm/d/HlDM Now you will need to import this .psd into photoshop. I recommend you download this file now it will only be up for 15 days before expiring!
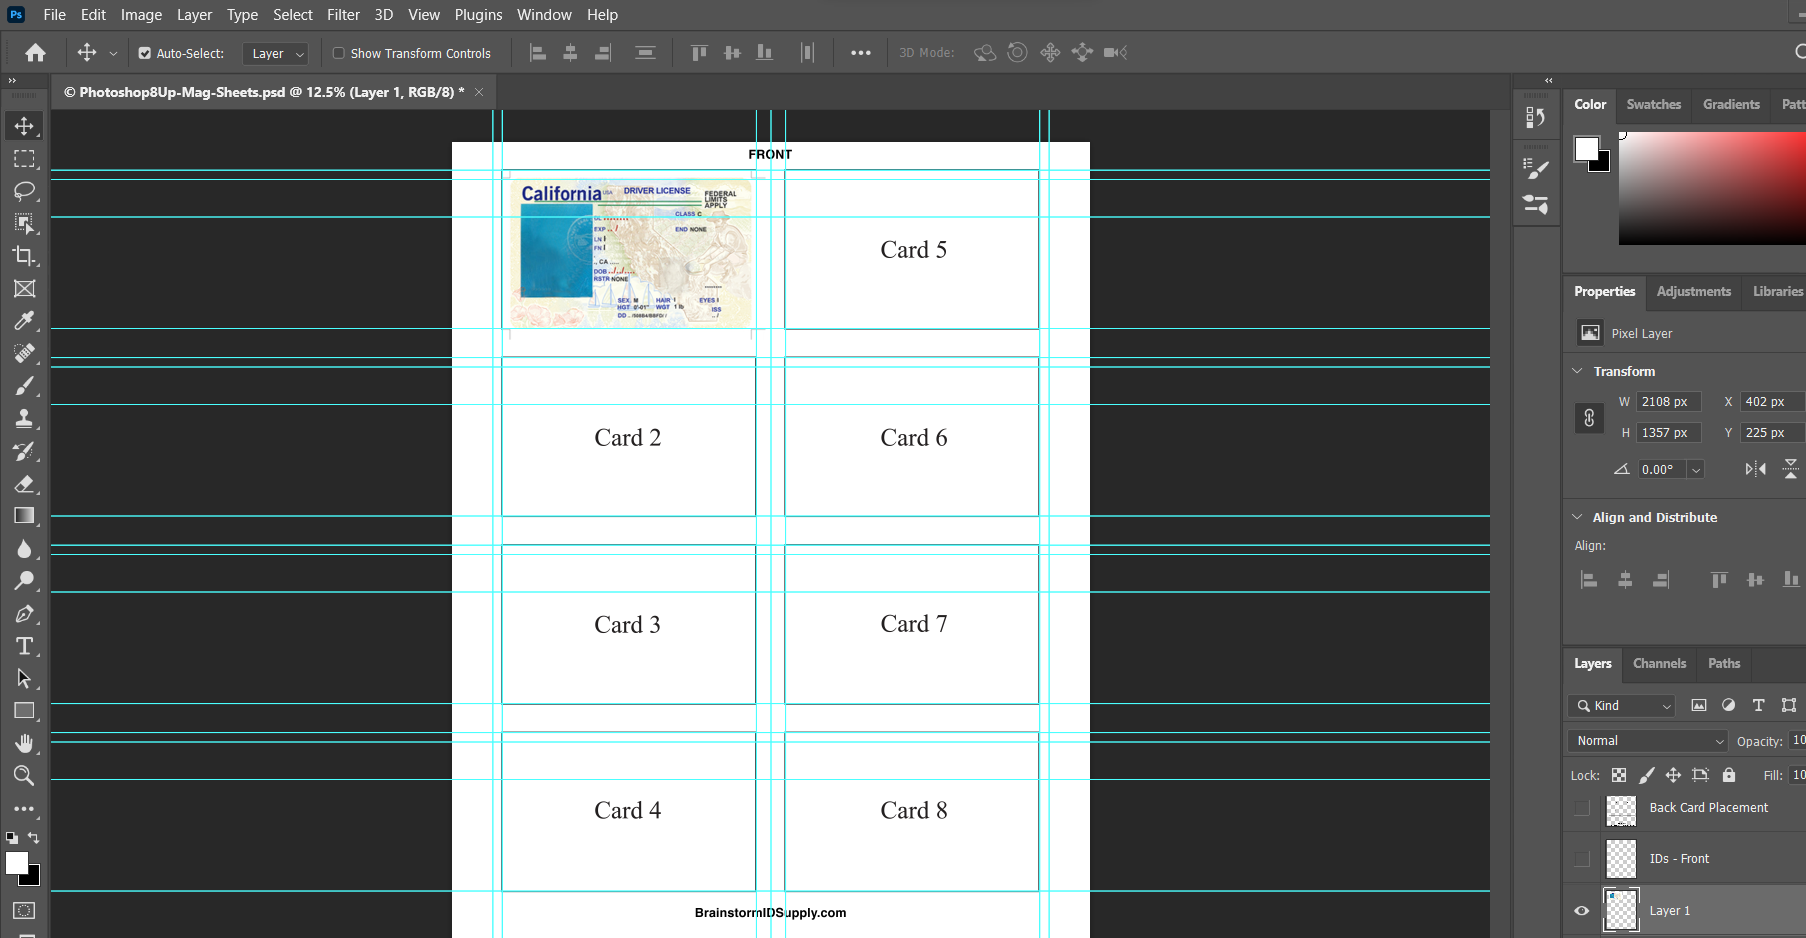
Once imported you will need to crop your original id pics down and size them into the proper Photoshop boxes. Remember if you want to print an exact front back to flip what side you place your backside image on. Otherwise just place the front and back next to each other. Once you think it looks good run it through your printer and keep trying to fix any errors until you get a print you are happy with.
Once you get a good print you can either cut out the ID from there ( Either by hand but I recommend using a dye cutter aka die cutter ) and use it for plays or you can laminate it to go the extra mile if you desire.
Next: You will need to get clear tape + gift card for structure OR a laminator with laminating sheets to make the IDlook more legit.
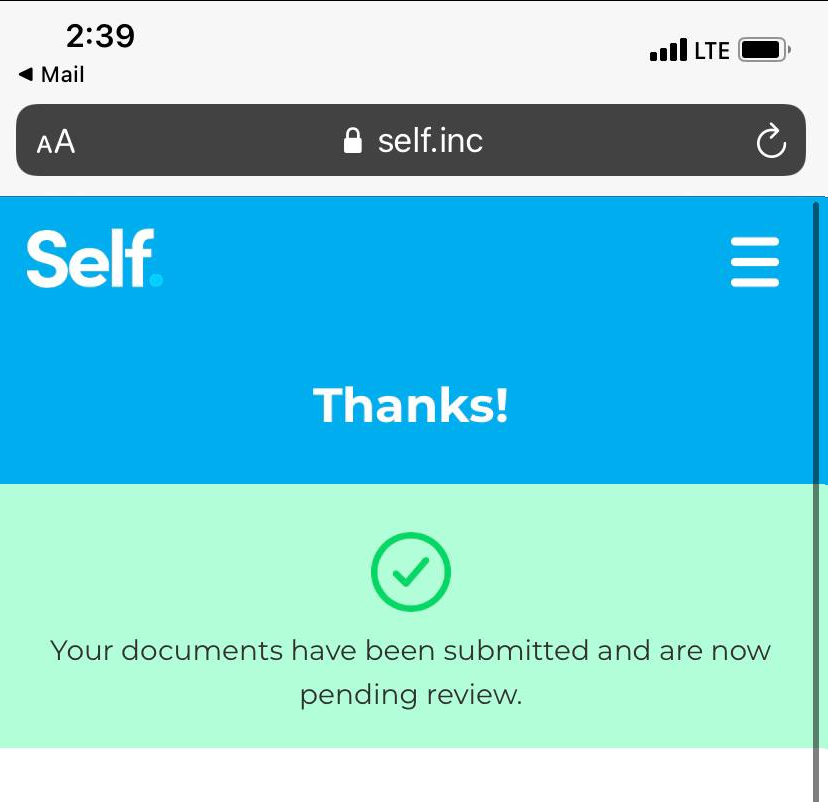
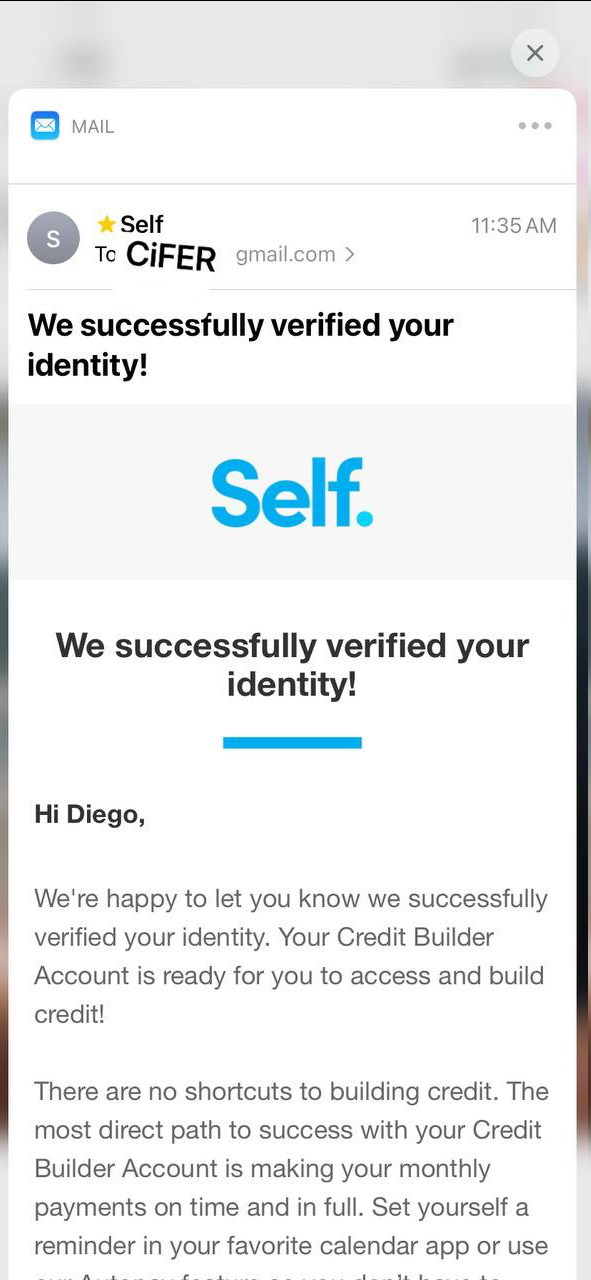
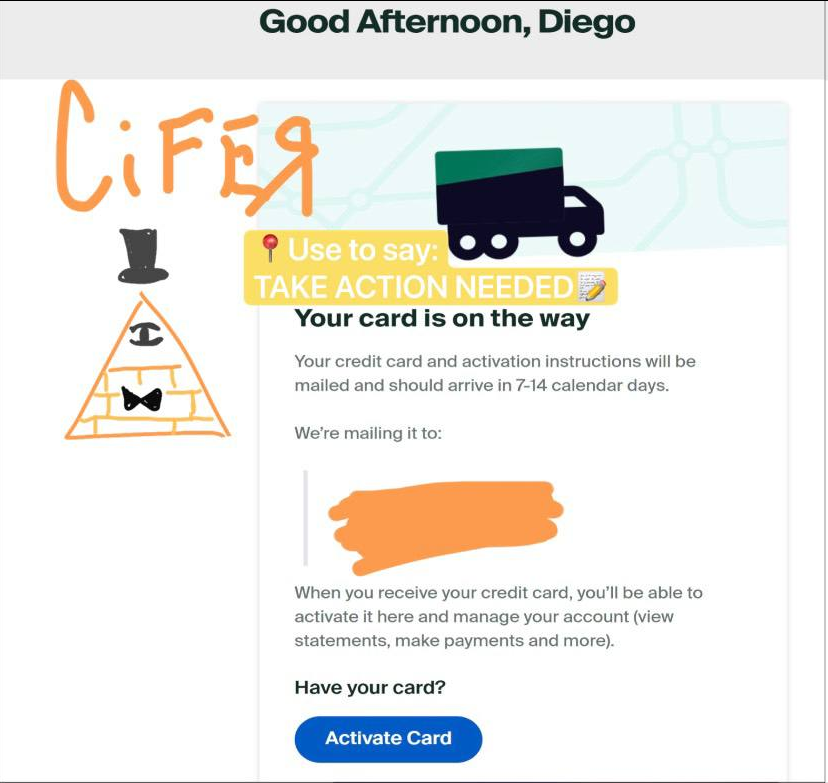
Now you should be ready for basic verifications, just be sure that the ID looks readable and clear from a cameras point of view and try to reduce glossiness for some states is a big factor to keep in mind too. If it is too shiny it may not scan properly so maybe play around with different sprays that reduce shine perhaps, I have better details regarding the specifics of that in my private class as previously mentioned. However lets now look at some examples of printed IDs that have worked for Approvals:

Keep in mind for things requiring selfie it is smart to have your person with you or use yourself for most ease, just be safe my friends
I have also Verified a business level account, however I cannot find a picture for it as reference.
That about summarizes some of the great success I have seen with ONLY CALIFORNIA of Verif.Tools. If you see something you don’t like REMEMBER this is a community based effort! No one man can know the specifics of each countries identity documents on their own! Feel free to submit high quality photos that you scanned from a printer or took from a high resolution camera photo to me and I will forward to the owner or to the Verif.Tools owner directly himself. I hope you enjoyed and if you have any questions or feedback please let me know my @ is provided in the description above!